How to Add Navigation Elements to Your Form
About Form Navigation Elements
Navigation within a form refers to the process of moving through different sections or fields of a form while filling it out. Form navigation ensures that users can easily progress through the form or return to a desired section or question at any time. In most cases, form navigation involves switching between form pages using the "Next" and "Previous" navigation buttons or the auto-advance feature. When dealing with complex multi-page forms, respondents can use side navigation (table of contents) or tabs that represent pages to switch easily between different parts of a form. Another type of form navigation is a progress bar that indicates the remaining number of pages or questions. In this guide, we'll show how to add and configure all navigation elements available in SurveyJS Form Builder.
Navigation Buttons
Change Button Labels
In the default setting, any multi-page form created in SurveyJS Form Builder has three navigation buttons: Next and Previous for moving forward or backward through the form, and Complete for form data submission. Certain use cases might require different button labels. For example, instead of "Complete", you might want the button to display "Register", "Submit", or "Confirm".
To modify the default button label, follow these steps:
- At the top of the Property Grid, select Survey to switch to the survey-level settings.
- Under Navigation, locate the input fields that contain the default button text: "Previous Page" button text, "Next Page" button text and "Complete Survey" button text.
- Enter a new value in any or all the fields to update their button labels.

Hide the Previous Page Button
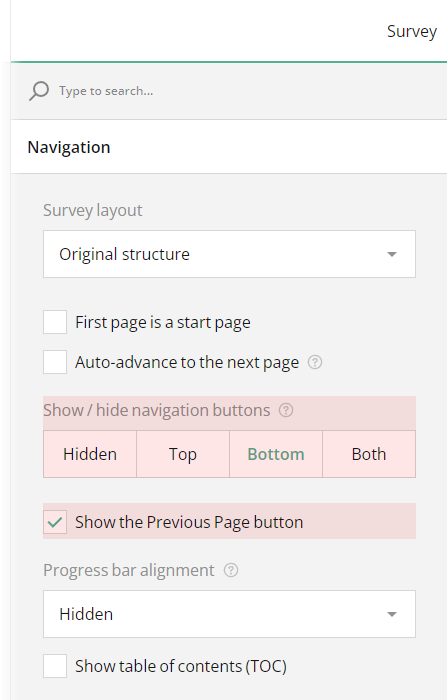
If you don't want respondents to revise or change their answers, you can hide the Previous button by unselecting the Show the Previous Page button checkbox. In this case, the respondents can only move sequentially from one field to the next without being able to move backwards.
Hide All Navigation Buttons
For complex multi-page forms with conditional branching, where you want to ensure that the form content is revealed gradually, it might be necessary to hide the navigation buttons. This way, users will only be able to follow the intended flow without jumping ahead.
To hide the navigation buttons for the entire form, follow these steps:
- At the top of the Property Grid, select Survey to switch to the survey-level settings.
- Under Navigation, locate the Show / hide navigation buttons property.
- Select Hidden.
You can also set the visibility of the navigation buttons for individual pages. A page-level button visibility rule overrides the same rule defined for the entire form.
To hide the navigation buttons for an individual page, follow these steps:
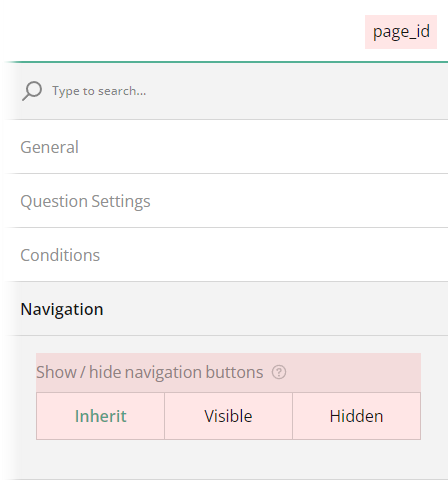
- At the top of the Property Grid, select the ID of the page on which you want to hide the navigation elements. This action will display the page settings in the Property Grid.
- Under Navigation, locate the Show / hide navigation buttons property.
- Select Hidden.
The Inherit option applies a survey-level setting (defaults to visible, aligned to the bottom).
Auto-Advance
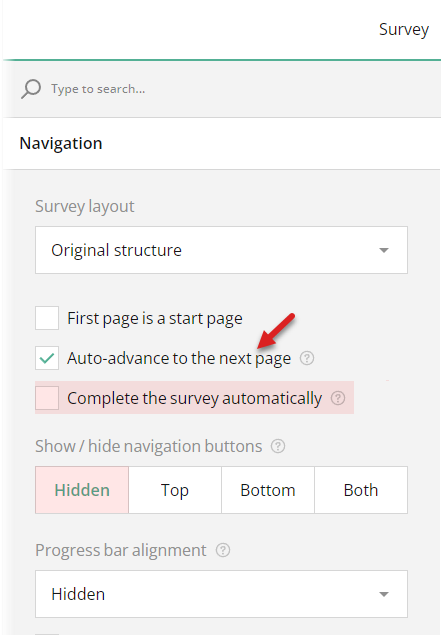
If you hide the navigation buttons, enable the auto-advance feature by selecting the Auto-advance to the next page checkbox. This feature allows the form to advance to the next page automatically after a respondent answers all questions on the current page. Note that a survey with auto-advance enabled is also completed automatically. If you want to disable this behavior, unselect the Complete the survey automatically checkbox.
Review and Edit Responses Before Submit
When the default navigation buttons—Next, Previous, and Complete—are hidden, you might still want to enable your respondents to review and edit their answers before submitting the form.
To enable the form preview, follow these steps:
- At the top of the Property Grid, select Survey to switch to the survey-level settings.
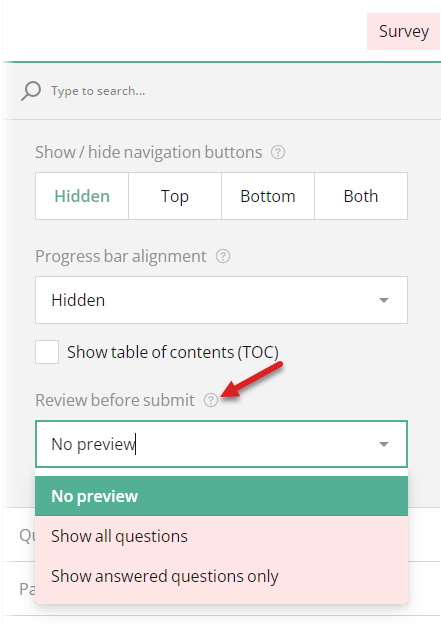
- Under Navigation, locate the Review before submit property.
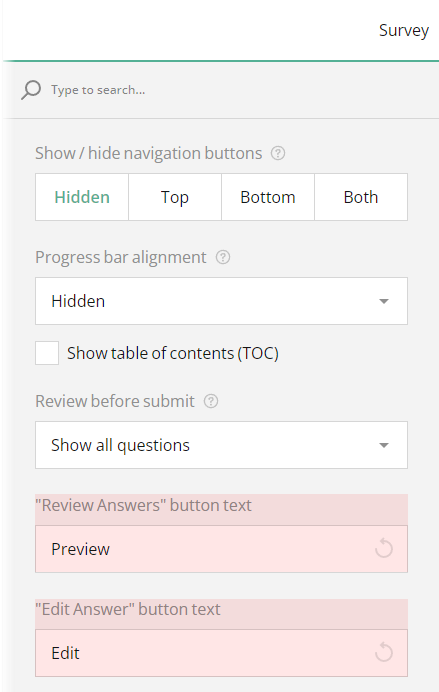
- Select between Show all questions (enables the preview page with all questions) or Show answered questions only (the preview page will only display questions with answers).
Once form preview is enabled, two additional navigation buttons—Preview and Edit—become available in the form. You can easily change their labels by entering new values in the corresponding input fields, as shown below.
Side Navigation (Table of Contents)
The table of contents (TOC) appears on the side of a form or survey and displays a list of all form pages. It can be combined with other navigation types to provide users with multiple ways to navigate through the form or survey.
To enable side navigation, follow these steps:
- At the top of the Property Grid, select Survey to switch to the survey-level settings.
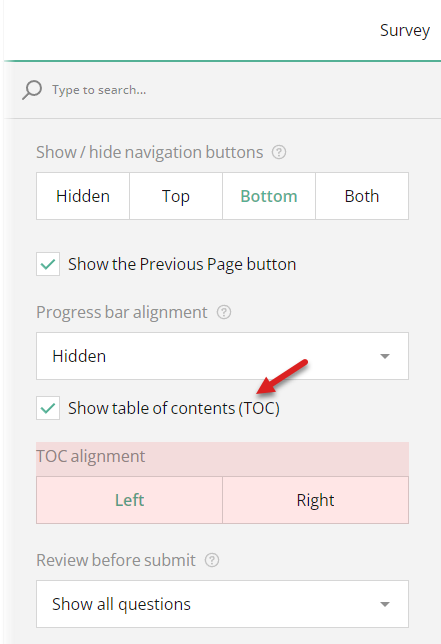
- Under Navigation, locate the Show table of contents (TOC) checkbox and select it.
- Under TOC alignment, choose between Left (default value) and Right to set the location of the side navigation.
Progress Bar
A progress bar allows users to see how far along they are toward completing the form or survey. It can show the number of questions or pages completed out of the total.
Progress Bar Alignment
The progress bar can be displayed at the following locations:
- Above the header
- Below the header
- Bottom of the form content
- Top and bottom of the form content
- Auto - Displays the progress bar below the header if the header has a background image or color. Otherwise, the progress bar is displayed above the header. This behavior is available only if you enable the advanced header mode in the form theme settings.
To set the progress bar alignment, follow these steps:
- At the top of the Property Grid, select Survey to switch to the survey-level settings.
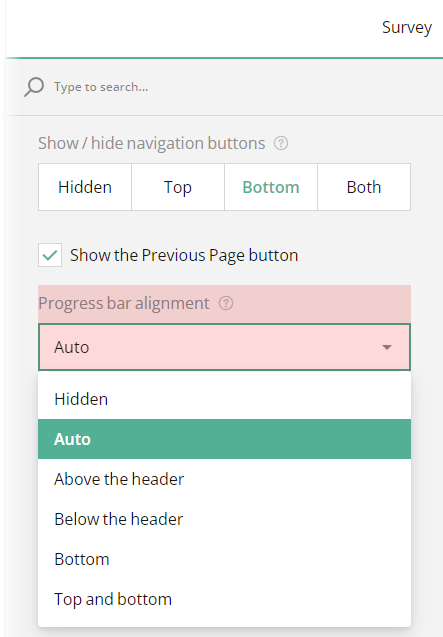
- Under Navigation, locate the Progress bar alignment property.
- In the drop-down menu, select among the available location options.
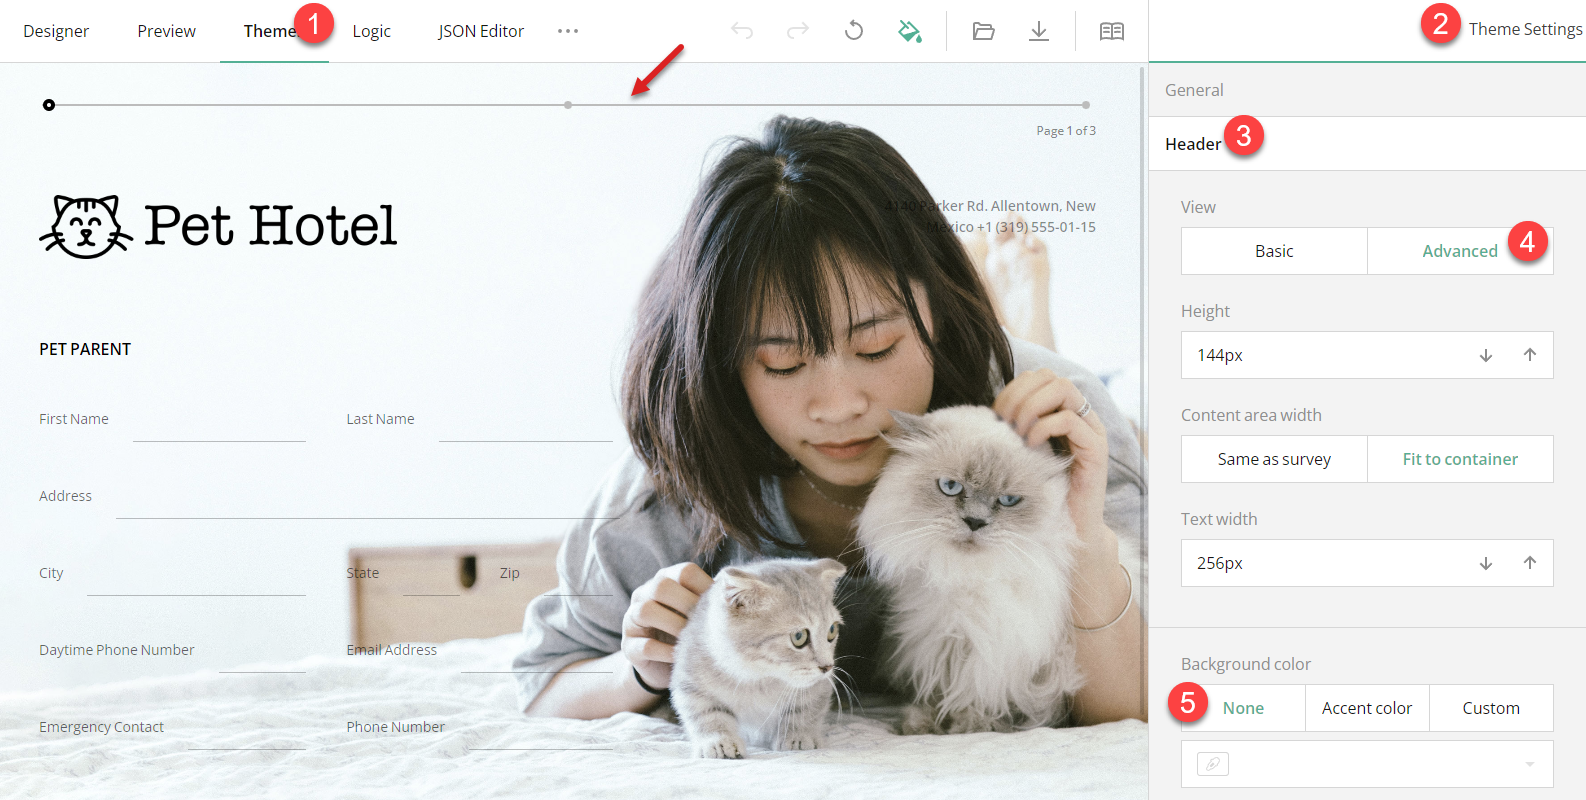
If you select the Auto alignment option for the progress bar, make sure to enable the advanced header mode by following the steps below:
- Switch to the Themes tab.
- Under Header, select Advanced to enable the advanced header mode.
- Set the Background color to None.
- Make sure the header doesn't contain images.
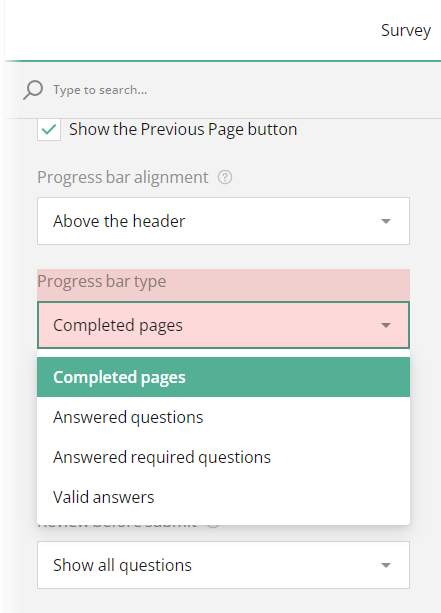
Progress Bar Type
To specify the information the progress bar should display, you can set the Progress bar type property to one of the following values:
- Completed pages (default)
- Answered question
- Answered required questions
- Valid answers (Counts required or correct answers)
To set the progress bar type, follow the steps below:
- At the top of the Property Grid, select Survey to switch to the survey-level settings.
- Under Navigation, locate the Progress bar type property.
- In the drop-down menu, select from the available options.
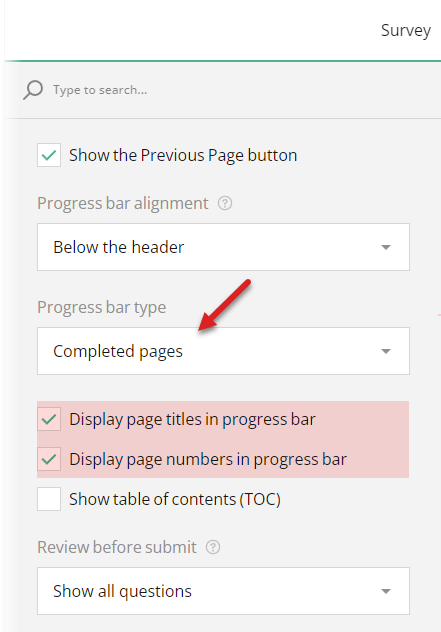
Progress Bar View
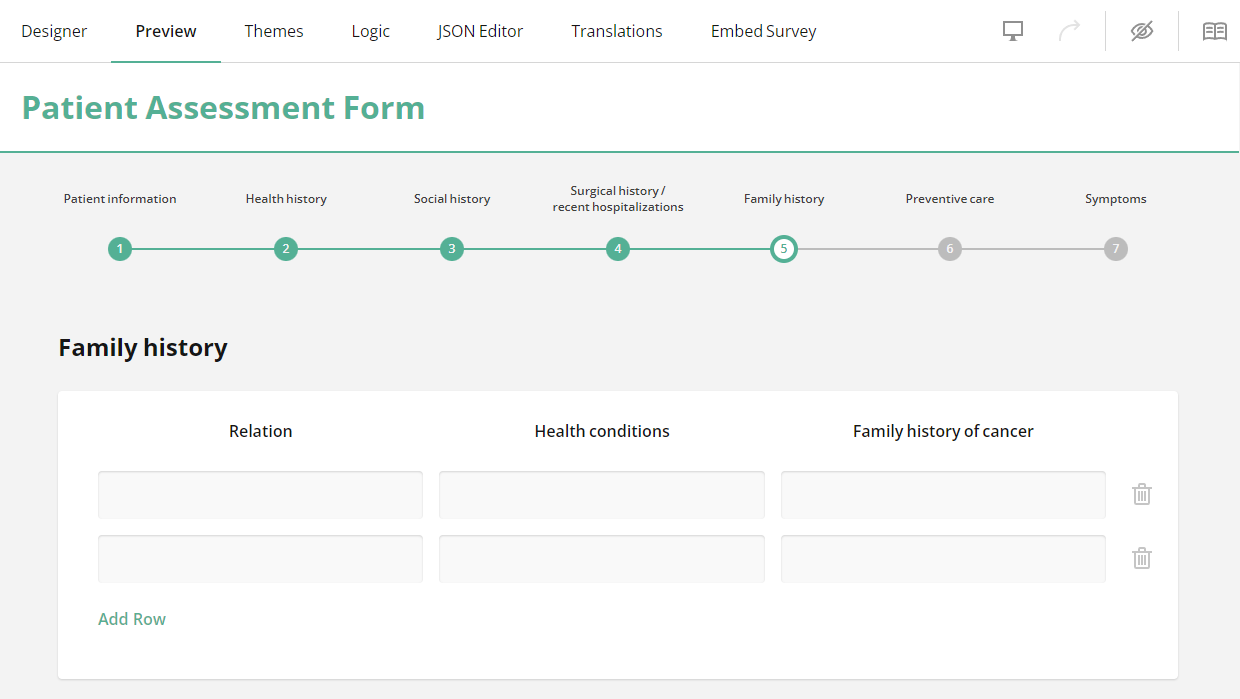
By default, the progress bar displays a thin line that connects multiple beads that represent individual pages. If you want to make it more informative, you can add page titles and numbers to it by enabling the Display page titles in progress bar and Display page numbers in progress bar properties. Note that these properties are only available if the Progress bar type is set to Completed pages.
As a result, the progress bar will look as shown in the image below.
Send feedback to the SurveyJS team
Need help? Visit our support page