Display Logic
About Display Logic
Display logic, also known as conditional logic, is a feature that allows you to dynamically show or hide certain form fields or sections based on predefined conditions. Instead of displaying all questions or options at once, display logic enables the form content to adapt in real-time according to the user's input and show only relevant information. This makes the form more user-friendly and ensures that users can complete it more efficiently.
How It Works
Every element you add to your SurveyJS form is automatically assigned an ID. This ID is not visible to respondents and is used in various form configurations, including display logic setup. By using element IDs, you can configure display logic on any form page, section, input field, or choice option.
Question ID
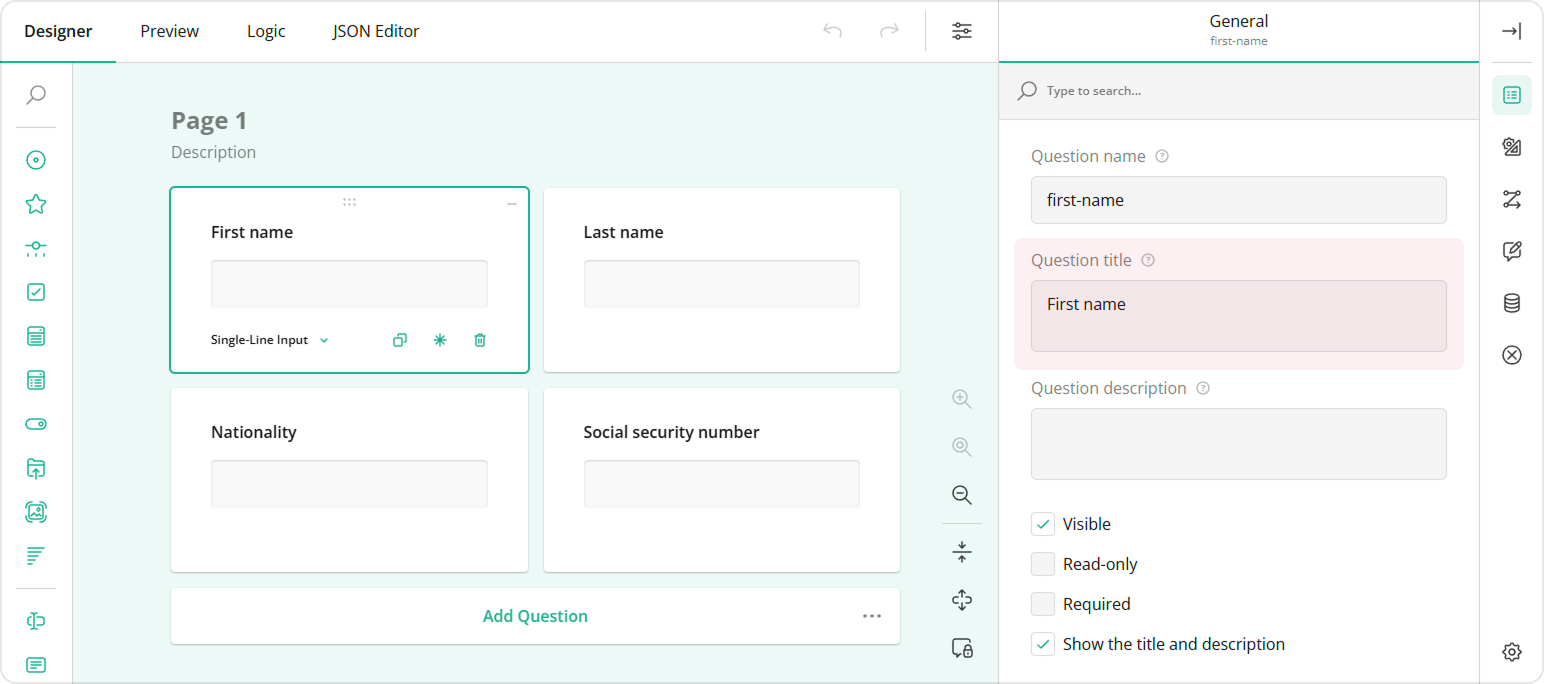
You can change the question ID in the General settings of a question by entering a new value in the Question name property.
Similar properties are used to set an ID for a page or panel (a container element that allows you to group and manage several questions together): Page name and Panel name.
Choice Option ID
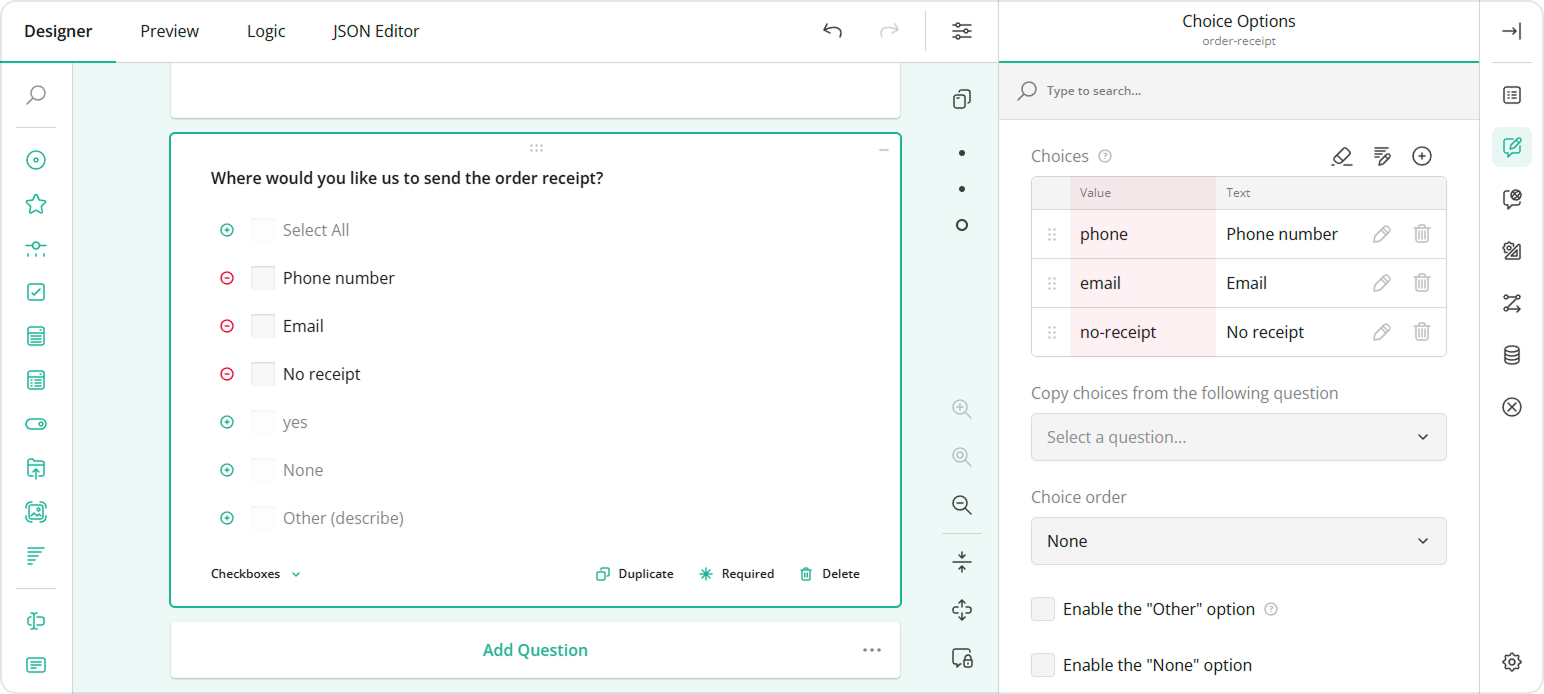
Choice options in single- and multi-select questions (Radio Button Group, Dropdown, Ranking, etc.) use the Value property to specify option IDs. To update the default choice option ID, select the question, and under Choice Options, enter a new ID in the left column. The right column values serve as display values that are visible to respondents.
Item ID
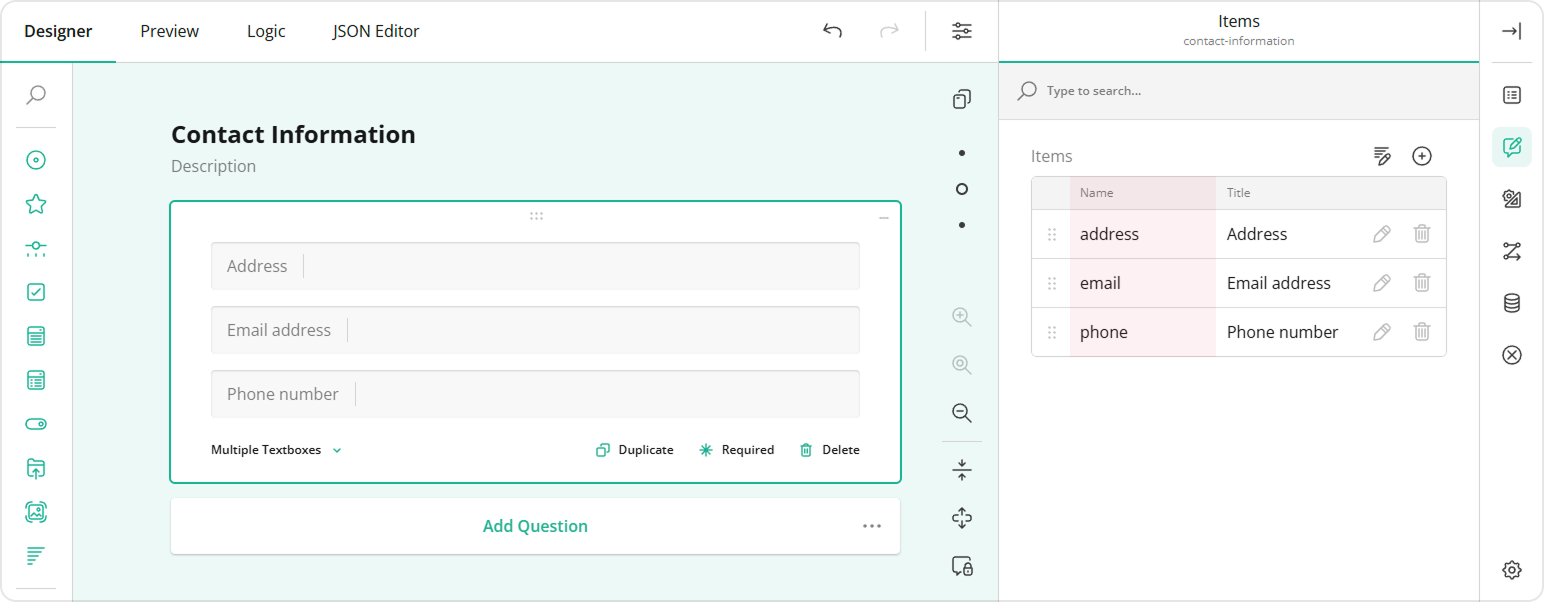
Certain multiple entry questions, such as Multiple Textboxes, use items instead of choice options. In order to manage the visibility of individual items or use them as trigger elements, item IDs are used. To change a default item ID, select the question, locate the Items table, and enter a new item ID in the Name column on the left.
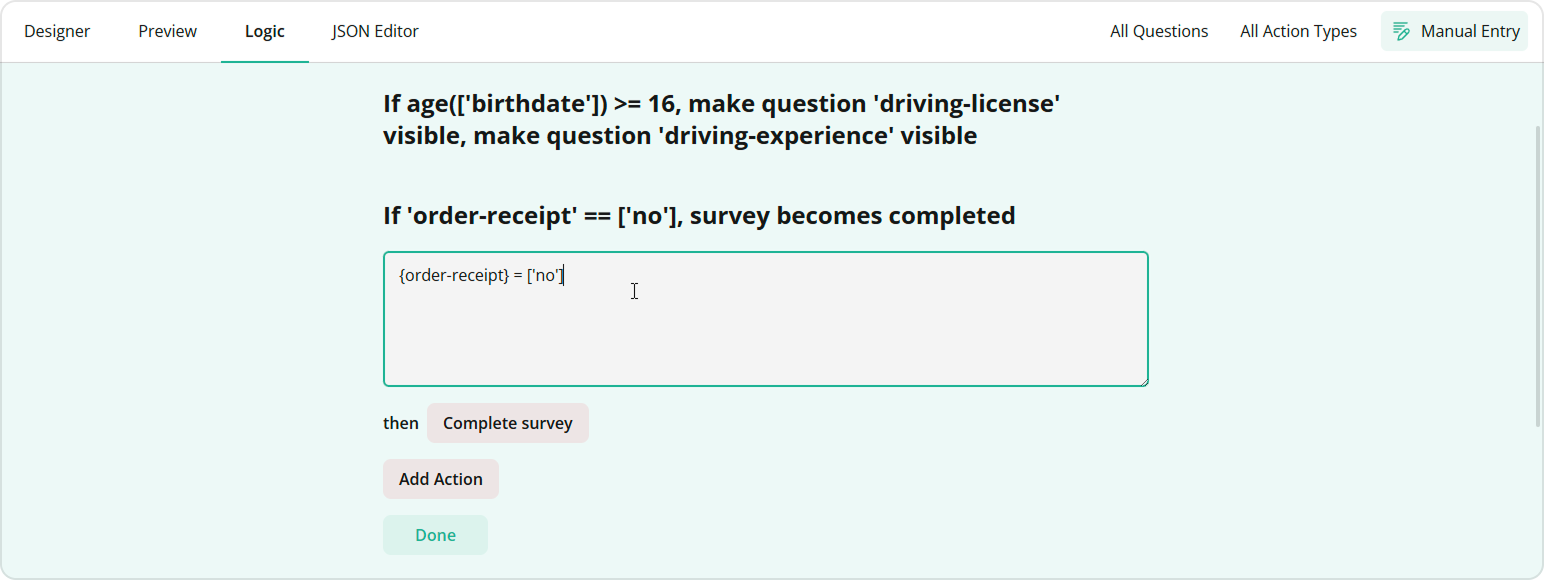
If you want to manually enter conditional rules and expressions that define display logic, make sure to use curly brackets for referencing the question ID whose value you want to access and use as a trigger element, e.g., {nationality} = 'United States', where nationality is a trigger question ID. Similarly, by appending a path to the value, you can access and use as a trigger a specific question item: {contact-details.email} notempty, where contact-details is a question ID to which an item belongs and email is the ID of the item itself. Otherwise, use the graphical user interface (GUI) described below to set up your display logic without manual entry.
Types of Display Logic
Conditional Visibility
Conditional visibility determines whether an input field, choice option, section, or the entire page of your form is displayed to the user based on specified conditions. For instance, in an online shopping checkout form, additional shipping address fields might only become visible if the user selects a different shipping address from their billing address.
Conditional Read-Only Mode
Conditional read-only mode logic controls whether a survey element is editable or in read-only state based on certain conditions. For example, in a survey form asking about age, the field for "Parent Name" might only be editable if the respondent indicates they are under a certain age.
Page Display Logic
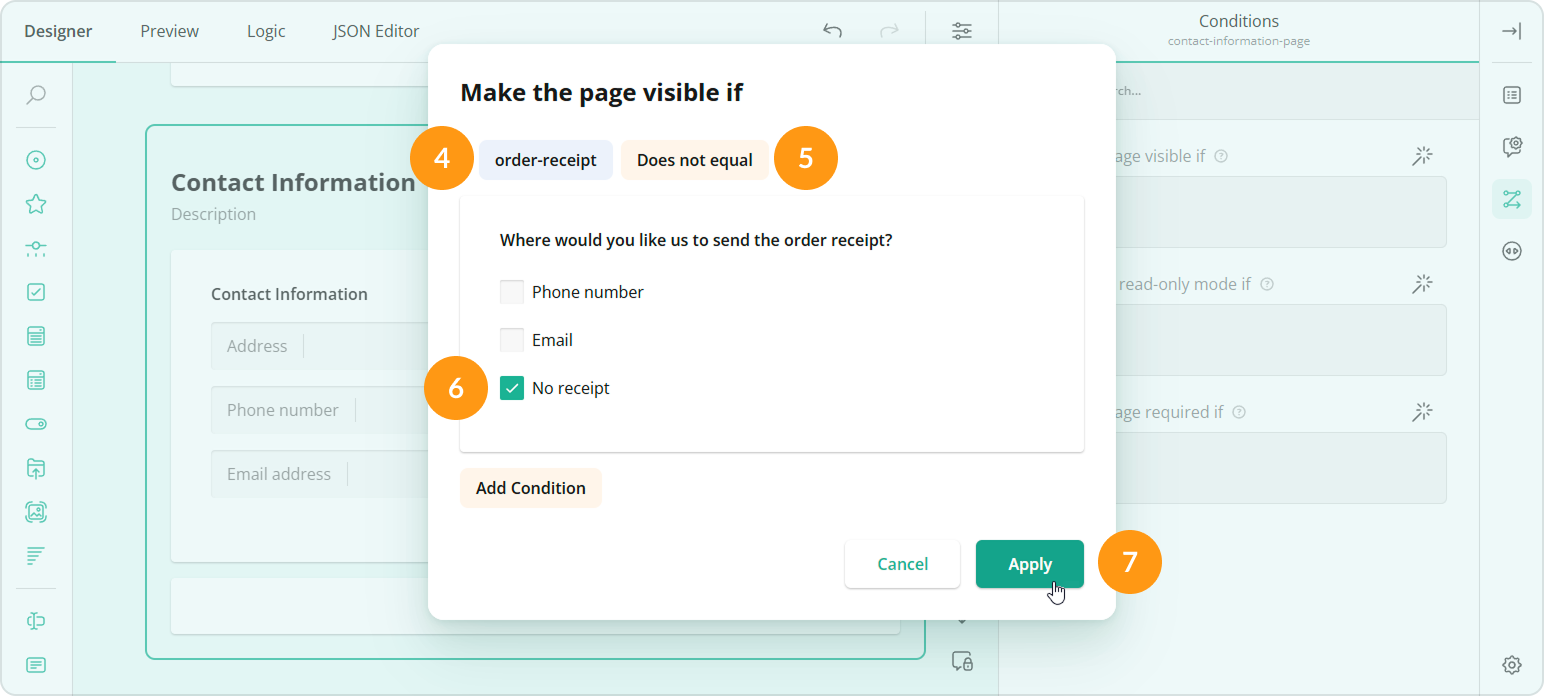
Page display logic is used to dynamically control the visibility and read-only state of form pages based on predefined conditions that include user input. To set up a display logic on a page, follow these steps:
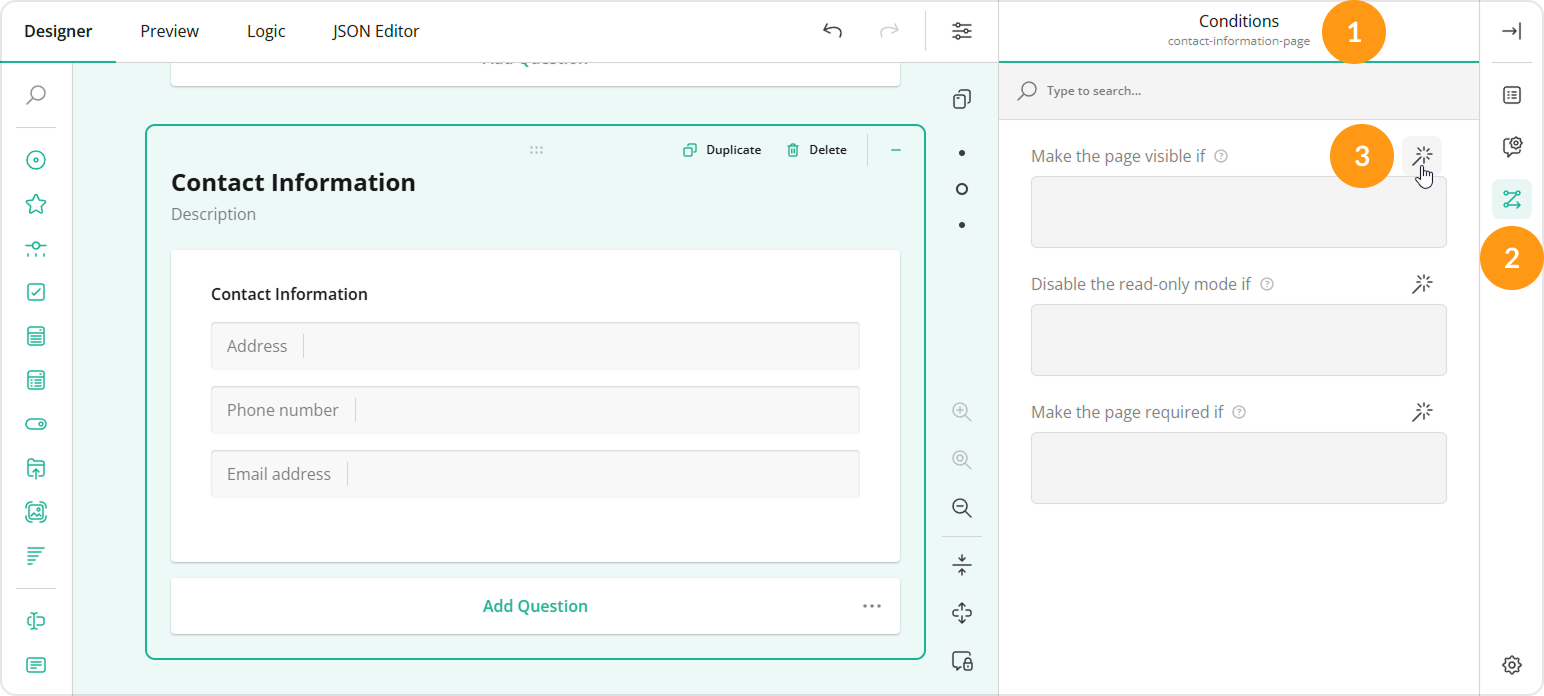
- At the top of the Property Grid, select the page for which you want to create a conditional rule or click the page on the design surface.
- Under the Conditions category, locate the Make the page visible if (if you want to conditionally hide the page) or Disable the read-only mode if property (if you want to conditionally restrict page editing).
- Click the Magic wand icon on the right of the property you want to configure. This action opens a popup with a GUI for setting up display logic.
- In the popup, select the trigger element ID.
- Select a condition from the drop-down menu: Empty, Not empty, Equals, Does not equal, Any of, Greater than, Less than, Greater than or equals to, or Less than or equals to.
- Type in or select the triggering answer.
- Click Apply.
Section Display Logic
In the SurveyJS Form Builder, a section of a form is referred to as a panel. It functions as a container that can be populated with various input fields and other panels to easily manage all nested elements at once. To set up a display logic on a panel, follow these steps:
- At the top of the Property Grid, select the panel for which you want to create a conditional rule or click the panel on the design surface.
- Under the Conditions category, locate the Make the panel visible if (if you want to conditionally hide the panel) or Disable the read-only mode if property (if you want to conditionally restrict panel editing).
- Click the Magic wand icon on the right of the property you want to configure. This action opens a popup with a GUI for setting up display logic.
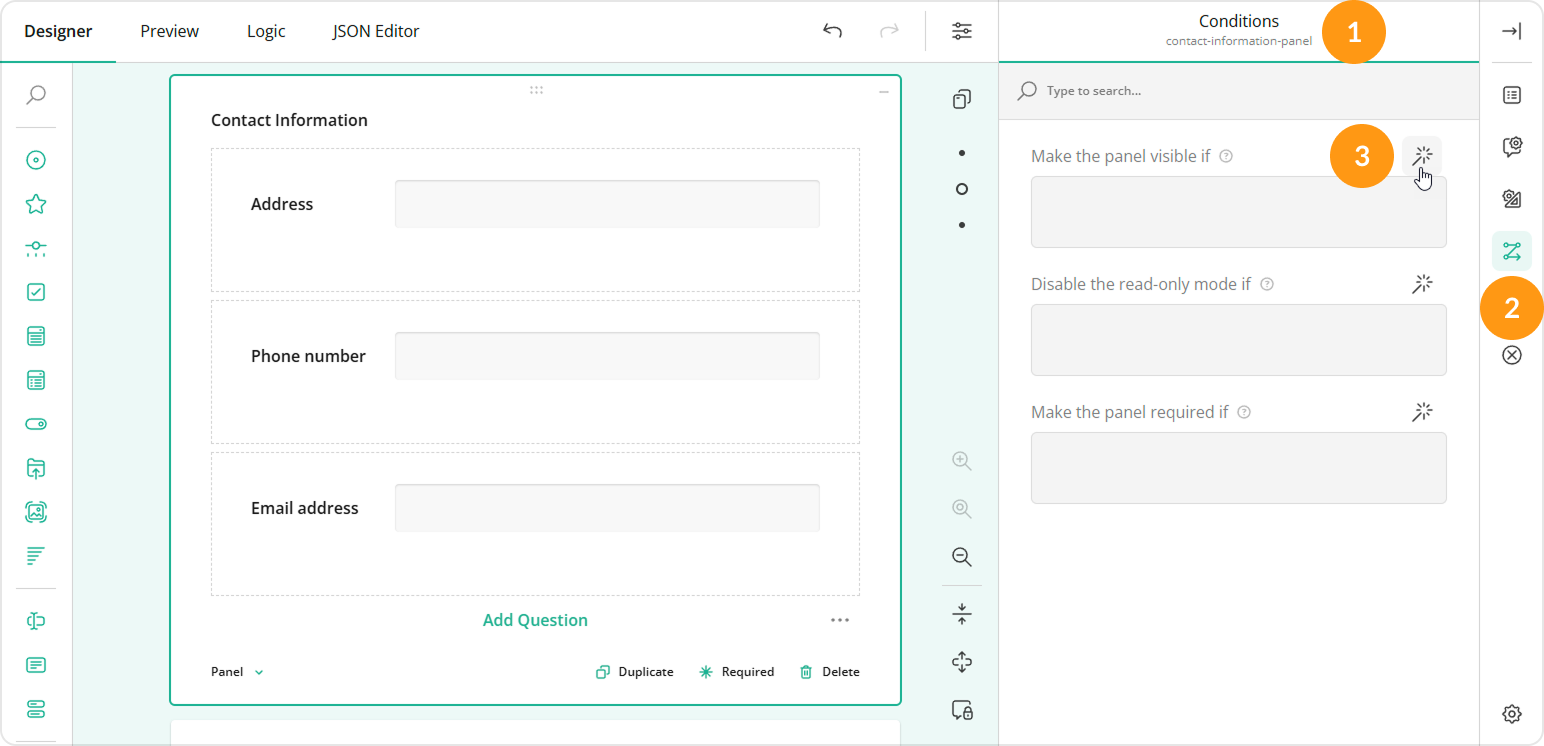
- In the popup, select a trigger element ID.
- Select a condition from the drop-down menu: Empty, Not empty, Equals, Does not equal, Any of, Greater than, Less than, Greater than or equals to, or Less than or equals to.
- Type in or select the triggering answer.
- Click Apply.
Question Display Logic
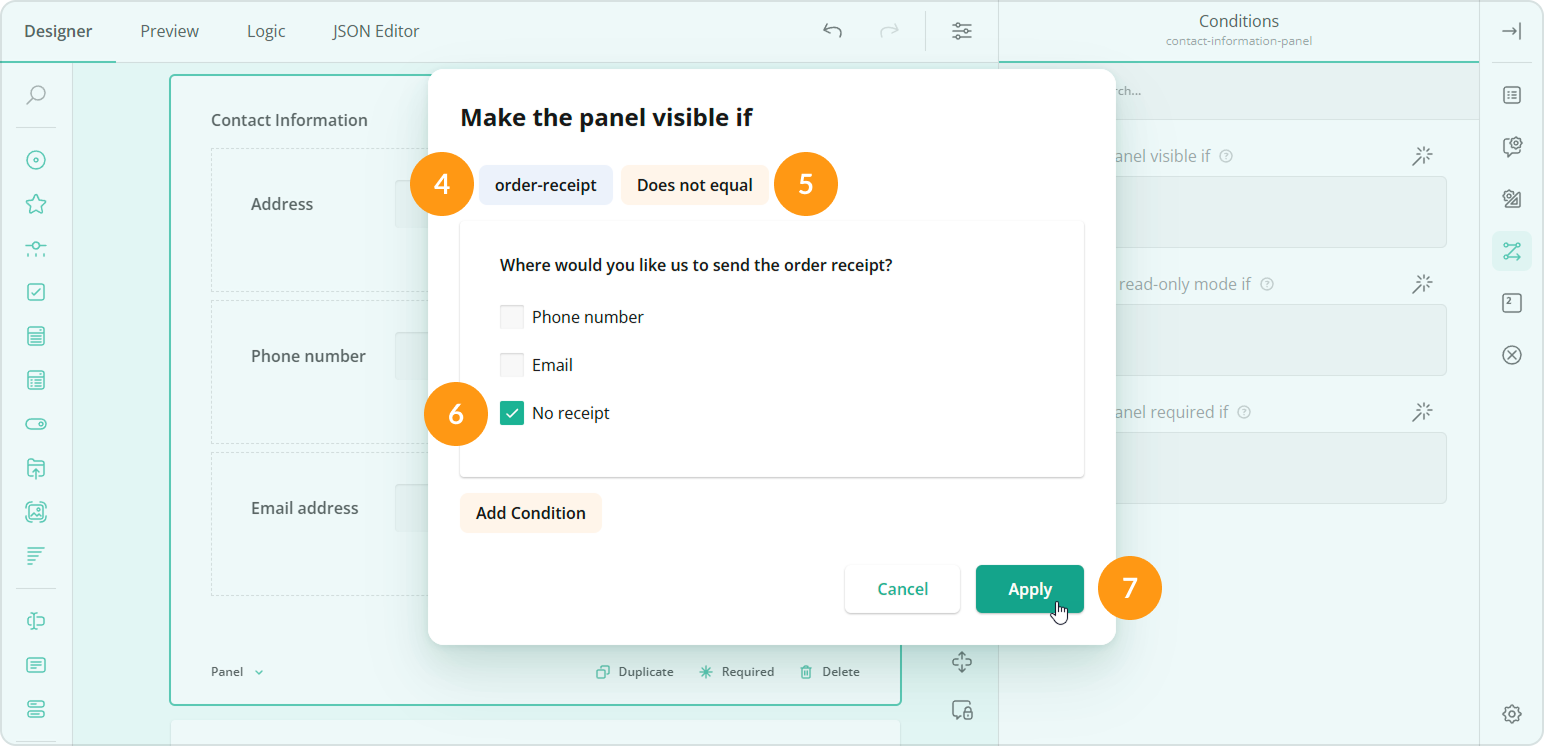
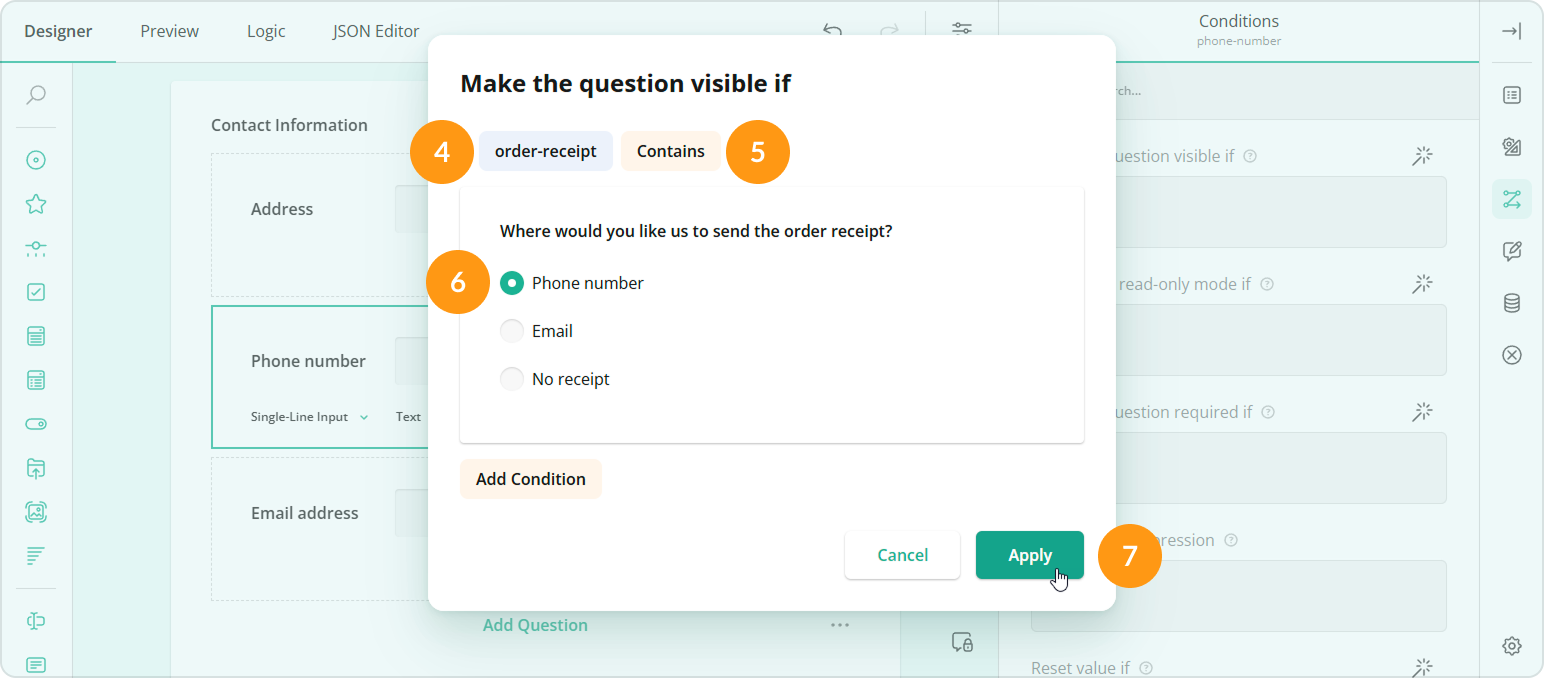
Question display logic allows you to dynamically manage the visibility and read-only state of form questions based on predefined conditions. To configure a display logic for a question, follow the steps below:
- At the top of the Property Grid, select the question for which you want to create a conditional rule or click the question on the design surface.
- Under the Conditions category, locate the Make the question visible if (if you want to conditionally hide the question) or Disable the read-only mode if property (if you want to conditionally restrict question editing).
- Click the Magic wand icon on the right of the property you want to configure. This action opens a popup with a GUI for setting up display logic.
- In the popup, select a trigger element ID.
- Select a condition from the drop-down menu: Empty, Not empty, Equals, Does not equal, Any of, Greater than, Less than, Greater than or equals to, or Less than or equals to.
- Type in or select the triggering answer.
- Click Apply.
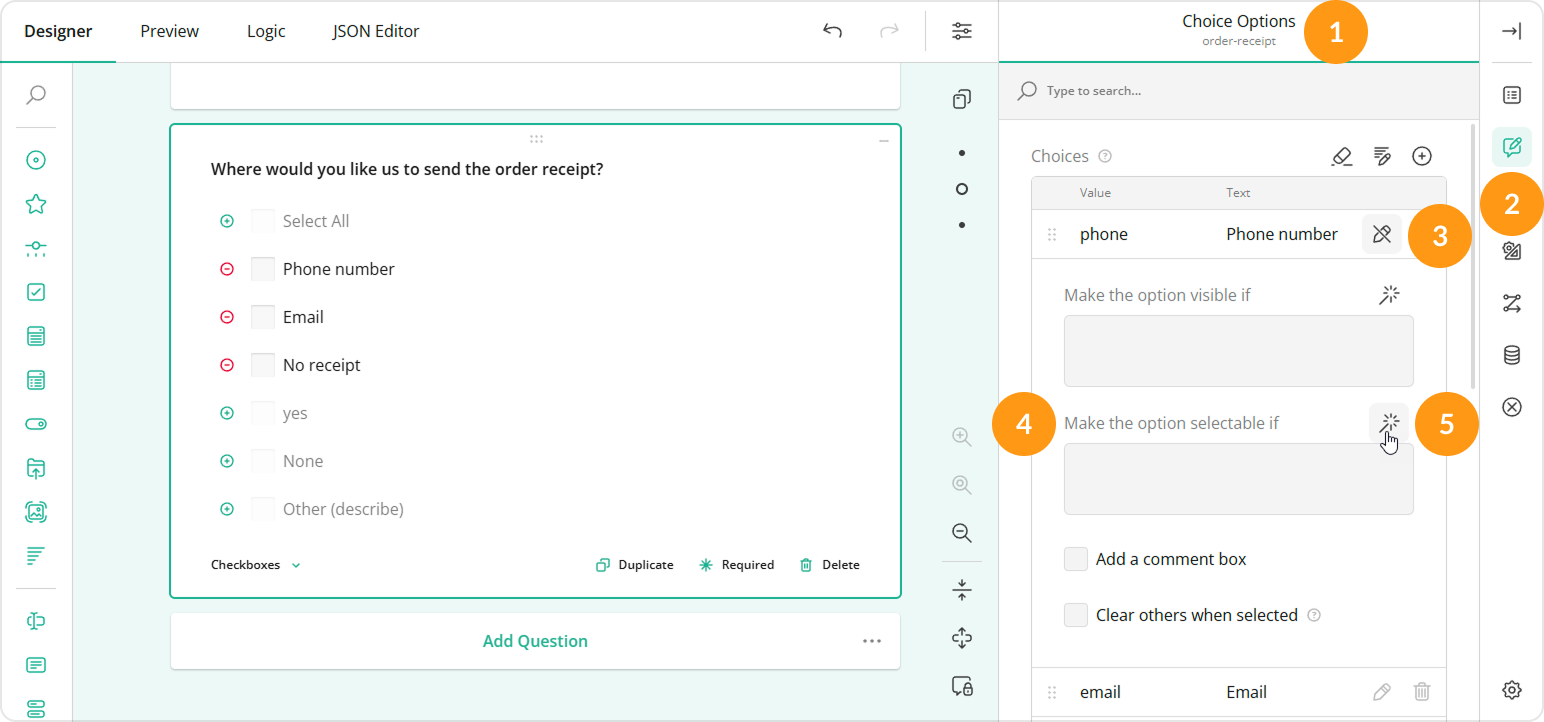
Choice Option Display Logic
Choice option display logic is used to determine the visibility and read-only state of specific options within a multiple-choice question based on a predefined condition. To set up a display logic on a choice option, do the following:
- At the top of the Property Grid, select the question to which the dependent choice option belongs or click the question on the design surface.
- Switch to the Choice Options category.
- Locate the dependent choice option and click the Pen icon to expand its individual settings.
- Locate the Make the option visible if (if you want to conditionally hide the option) or Make the option selectable if property (if you want to conditionally disable the option).
- Click the Magic wand icon on the right of the property you want to configure. This action opens a popup with a GUI for setting up display logic.
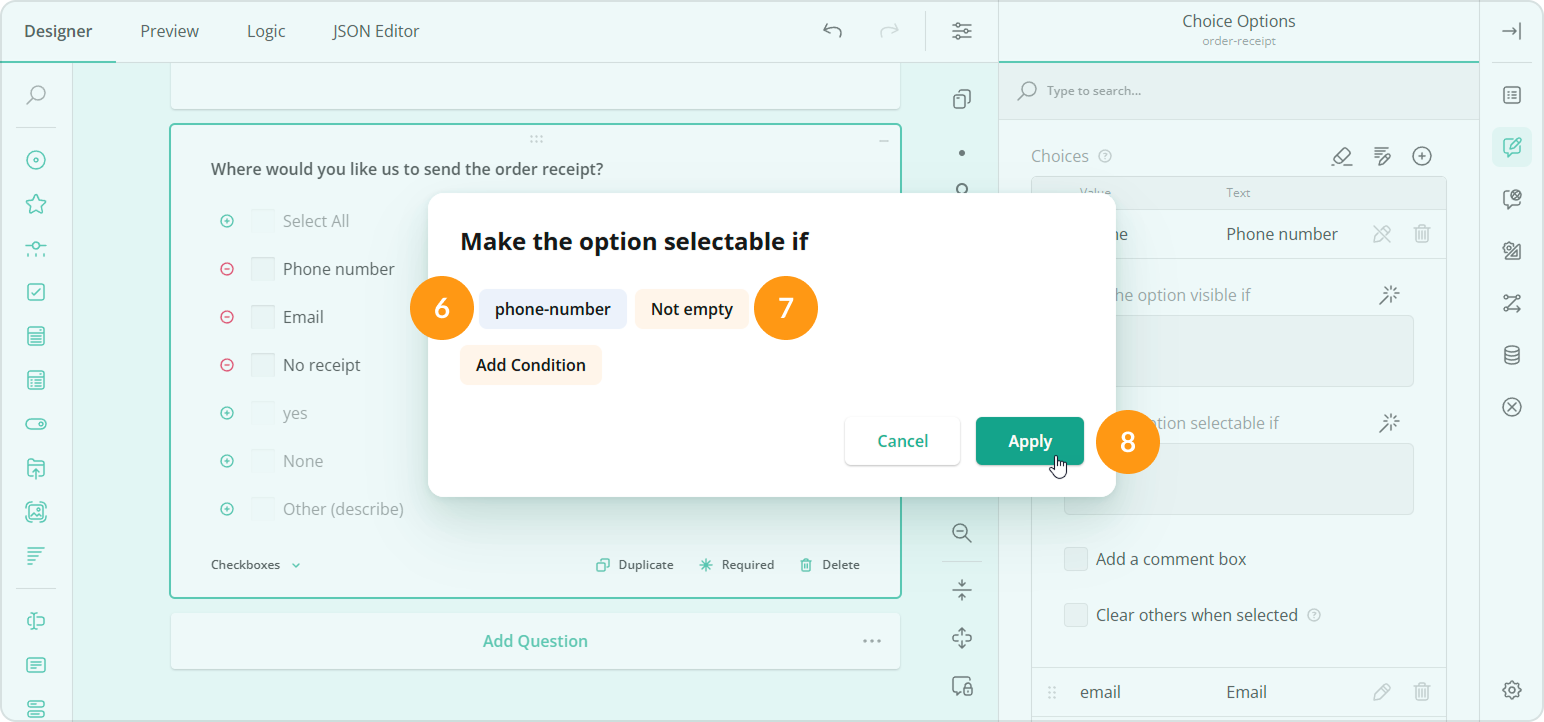
- In the popup, select a trigger element ID.
- Select a condition from the drop-down menu: Empty, Not empty, Equals, Does not equal, Any of, Greater than, Less than, Greater than or equals to, or Less than or equals to.
- Type in or select the triggering answer if required and click Apply.
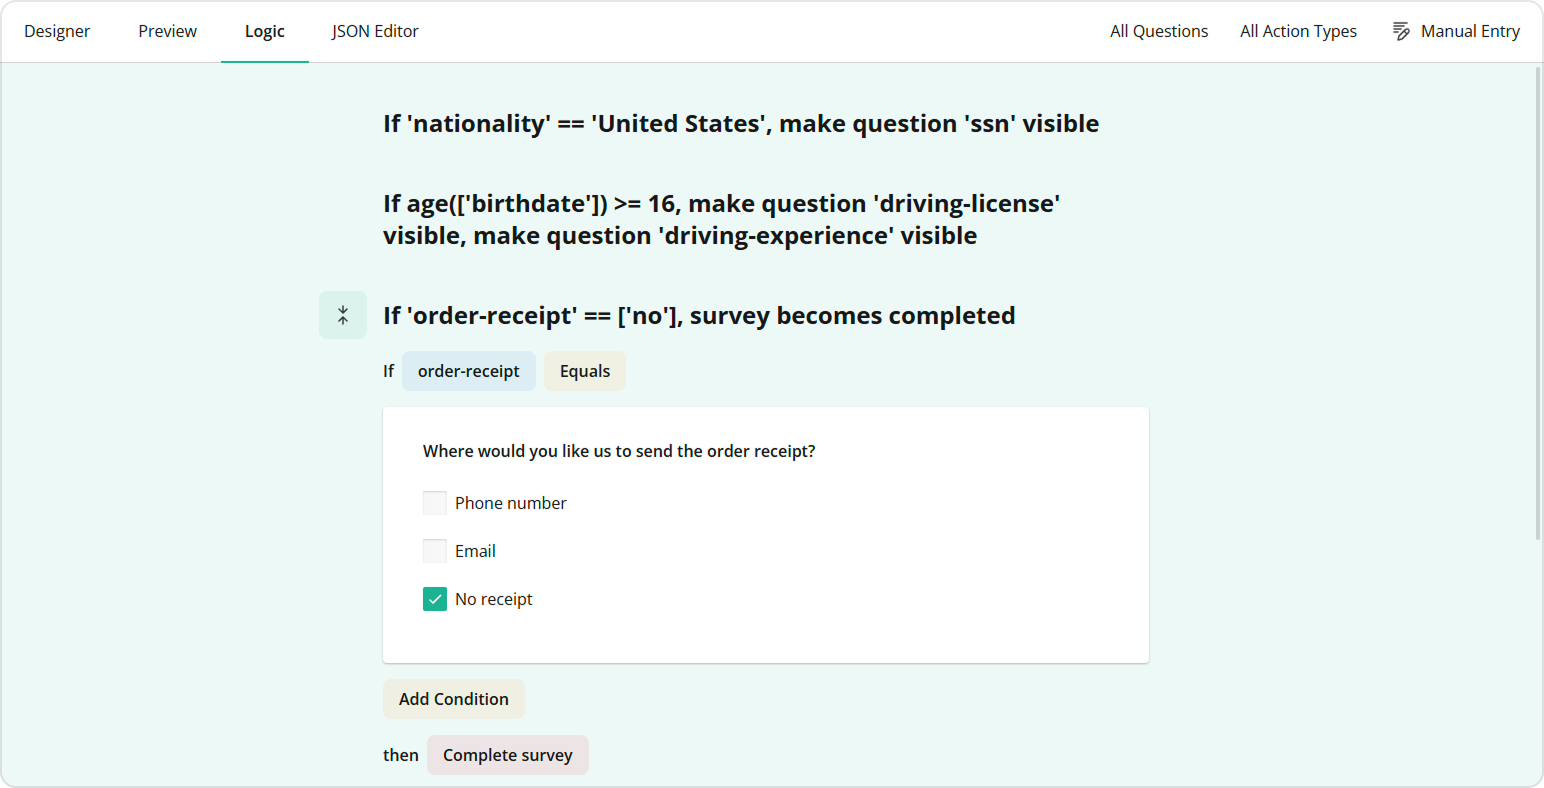
Edit and Remove Display Logic in the GUI
SurveyJS Form Builder features a Conditions section in the Property Grid for all form elements and a dedicated Logic tab. This flexibility allows users with varying technical expertise to easily set up display logic on any form element through a GUI. The Logic tab consolidates all conditional rules created in individual Conditions sections of the Property Grid. Through the Logic tab, you can quickly access and edit existing rules in one centralized location without the need to navigate to specific form elements.
To remove a conditional rule, follow these steps:
- Navigate to the Logic tab.
- Locate the conditional rule you want to remove and click the Bin icon that appears as you hover over the rule.
The default settings of the form builder do not offer a confirmation message upon deletion. The deleted conditional rule cannot be restored.
To edit a conditional rule, do the following:
- Navigate to the Logic tab.
- Locate the conditional rule you want to edit and click the Expand icon that appears as you hover over the rule.
- Make necessary adjustments.
- Click Done to save changes.
If you're managing complex conditional rules, you can input them manually. To activate manual entry mode, expand a logic rule and click Manual Entry in the top right corner of the Logic tab.
Troubleshooting Display Logic
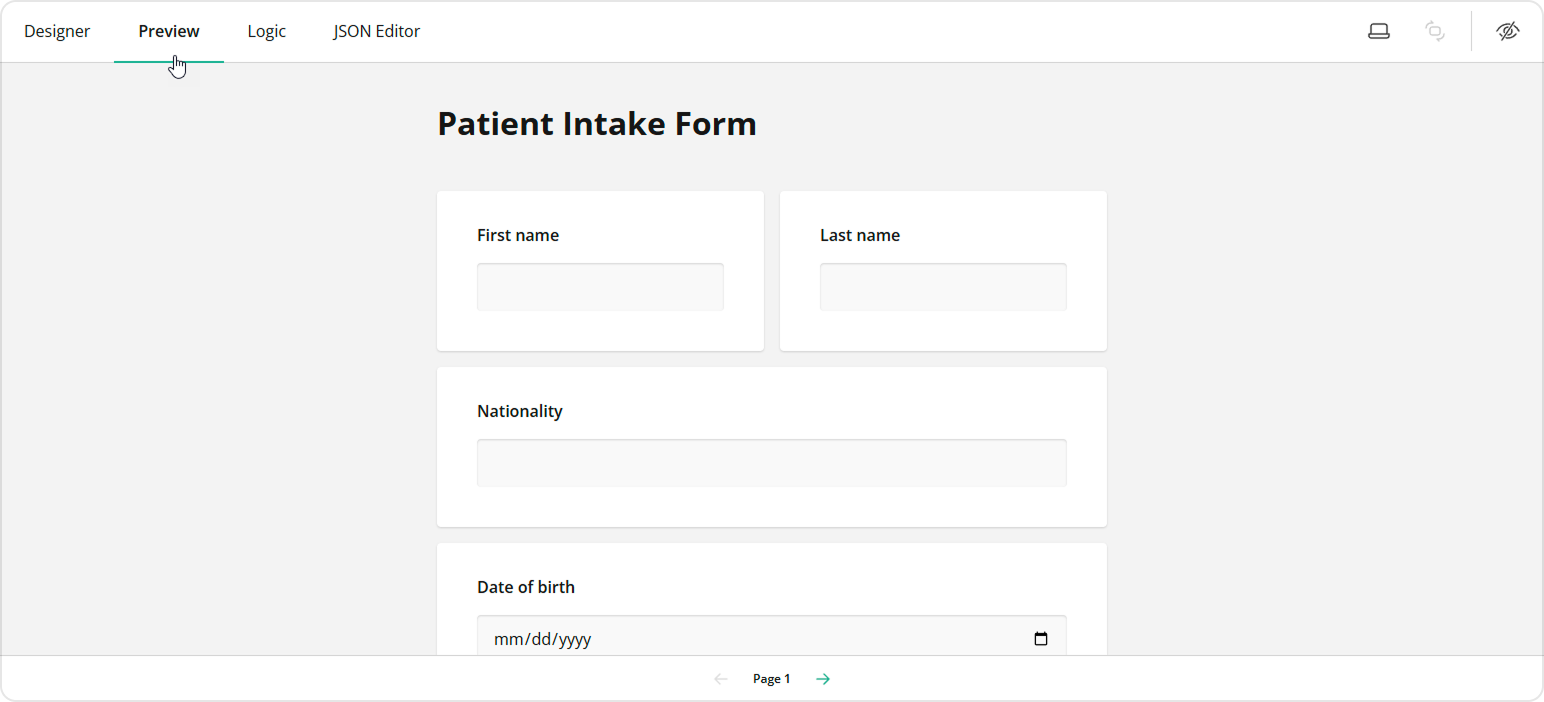
To check whether the display logic you set up works as intended, navigate to the Preview tab and interact with the form as a user would. Enter or select different responses and observe whether the dependent form elements behave accordingly.
See Also
Send feedback to the SurveyJS team
Need help? Visit our support page